Category: Spindle Repair

  • Critical Spindle Installation Steps: Balance Correction & Vibration Baselining

    Previously, we discussed the importance of proper spindle installation. In particular, we reviewed important basic steps — pre-installation inspection, mounting, lubrication hookup, post-installation inspection, and start up/run in.

    But there are two steps that we left out of that blog. Not because they’re important, but because they’re the most important. Those steps are balance correction and vibration baselining.

    Balance Correction

    Balancing Your SpindleSpindles are super-precision components with incredibly precise operating parameters. Testing the balance of a spindle is a good way to help ensure a new spindle is installed and will perform correctly.

    While spindles are shipped from manufacturers and repair facilities already carefully balanced, that balance can easily be thrown off by rough handling during shipment or, more commonly, the installation of mounting accessories. Every different mounting accessory you include during a spindle installation will have an impact on the standard balance.

    For that reason, you should check the balance of a newly installed spindle as soon as it is properly warmed up. Use a solution such as BalancePro. We developed BalancePro years ago as an iOS app for testing the balance of both one- and two-plane rotating machinery, like spindles. It’s a powerful tool for not only helping you to balance spindles, but for collecting and storing data for a variety of metrics (popover, amplitude, polar plot, and more).

    Vibration Baselining

    VibePro Spindle Vibration Analysis SystemAfter your spindle is in balance, the next step is to gather baseline vibration measurements. Vibration measurements are less common but arguably as important, if not more so, as balance correction.

    As high-velocity instruments, spindles vibrate as a natural part of operation. If you get measurements of your spindle’s standard vibrations immediately after installation, when it’s at its cleanest and most perfectly balanced, you have incredibly valuable baseline numbers to measure future data against.

    As you continue to run your CNC and spindle in daily operations, you can take vibration measurements and compare them to your baselines. High-quality vibration measurement equipment can detect minuscule changes in vibration that an unaided human operator could never notice. 

    This gives you astounding insight into the inner workings of your spindles, providing warnings about developing issues long before they become catastrophic failures. You can save tremendous amounts of money in unexpected repair or replacement costs, all thanks to getting a vibration baseline measurement during installation.

    Be sure to use a field-proven solution, such as our VibePro, to collect and record accurate vibration measurements. VibePro is an expansive turnkey spindle monitoring system consisting of discreet three-axis omnidirectional vibration sensors and an expansive iOS app for collecting, storing, analyzing, and sharing vibration data.

    Conclusion

    While all the steps of a spindle installation are important, balance correction and vibration baselining stand out as particularly so. All of the care you take during mounting is for nothing if you don’t ensure that your spindle is properly balanced at the end. And you’ll be operating virtually in the dark, in regards to your spindle’s health, without baseline vibration measurements.

    In short, it’s imperative that you carefully follow all of the steps while installing your spindles — otherwise, you’ll be in for a world of hurt somewhere along the line.

  • Spindle Installation: Getting it Right the First Time

    CNC Spindle Installation

    We understand the impulse to get a new spindle installed, and up and running, as quickly as possible. Time is money, after all — especially in fiercely competitive manufacturing spaces.

    The fact is, though, that in their desire to minimize costly downtime, many CNC operators rush the spindle installation process. This simply sets the stage for bigger and more expensive issues down the road.

    It pays to do it right, so here’s a refresher.

    Why take the time to install a spindle properly?

    Most maintenance questions relating to spindles boil down to one simple equation: pay now or pay more later.

    That might seem reductive, but it’s the truth. You can periodically pull spindles for regularly scheduled maintenance, costing a few hours of downtime to do the swap; or you can wait for a catastrophic failure, costing tens of thousands in repair or replacement costs, plus many more in unplanned downtime.

    The same holds true for new spindle installations. It may take a couple more hours than you’d like in order to do a good, thorough, by-the-books installation of a new spindle, but you’ll be saving yourself untold thousands of dollars in expenses later on.

    Proper spindle installation

    Spindle Installation Set-Up
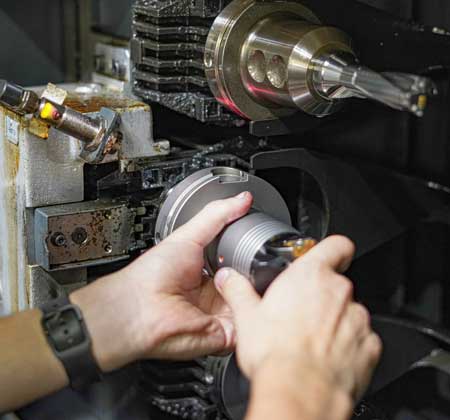
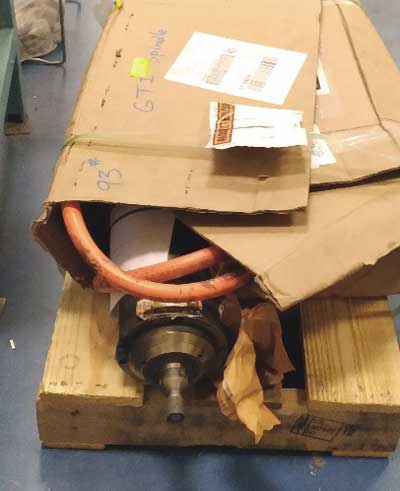
Spindles are super-precision instruments that require the highest degree of care, handling, and calibration. This means that installation can be rather a complex process.

    Every CNC machine and every spindle is unique. As such, they each have unique installation processes. The steps detailed below should be considered general guidelines — always follow manufacturer-provided process when installing a new spindle.

    Safety

    Do not perform any maintenance on any machinery without first disconnecting the equipment from power.

    Pre-installation Spindle & Machine Inspection

    Before installing a spindle, be sure to inspect both the spindle itself and the machine in which it is to be installed. Check the following:

    • Use caution to avoid impacts, which can damage spindle bearings
    • Clean all mounting surfaces, both on the CNC and the spindle itself

    Mounting

    Mounting a super high-precision component like a spindle is a delicate job, as even small mistakes can have notable impacts. While mounting:

    • Use chains or straps with enough lift capacity to minimize risk of drops
    • Do not force a spindle into position under any circumstance; if a spindle will not fit, stop and ensure that you’re attempting to mount it in the correct way
    • Back off immediately in the event of binding
    • Secure the spindle to standard torque values, unless other values are specifically called out in the manufacturer’s mounting instructions
      • Overtightened bolts will distort the spindle housing, which can result in instant spindle failure
    • Never use pipe dope, tape, or other compounds on the threads of lubrication fittings
    • Ensure that all mounting accessories — rotary unions, draw bars, pulleys, toolways, etc. — are clean, new (when recommended, like for rotary unions), and installed properly

    Lubrication System Connection

    Spindle Lubrication SystemAfter physically mounting a spindle, the lubrication system must be connected. Ensuring cleanliness of the system is of utmost importance, as there is no filter between the lubricator and the spindle. When connecting a mounted spindle to the lubrication system, consider the following:

    • Keep all hoses and fittings clean, inside and out
    • Ensure hoses are free from kinks
    • Never use any sort of fitting aid (pipe dope or PTFE tape)
    • Where possible, blow air through lines for at least 5 seconds to dislodge contaminants
    • After all connections are made, test the system:
    • On drip systems, calibrate air pressure
    • Test lubrication pressure
    • Test flow

    Post-installation Spindle & Machine Inspection

    There are a variety of tests and inspections that you should make before attempting to start up and run in your newly installed spindle. A few of these checks include:

    • Air purge/blow out
    • Direction of rotation
    • Distention
    • Encoder feedback
    • Runout
    • Taper blast
    • Tool knockout, changer alignment, and retention

    Start Up & Run In

    Starting up and running in your newly installed spindle is a critical phase in the installation process — if not performed correctly, all of the careful work you’ve done so far can be undone in seconds. You should always carefully follow the manufacturer-specified procedures, but you can see our blog post on spindle start up and run in for a helpful overview.

    Conclusion

    Spindles are delicate, super-precision components, which makes every stage of installation incredibly important. That’s why we put so much emphasis on following manufacturers’ instructions whenever available.

    When installing a new spindle, make sure that you carefully follow all installation steps. This includes two extremely important considerations: balancing and gathering vibration reading baselines, which we’ll talk about next month — stay tuned.

  • The Importance of Warming Up Your Machine Tool Spindle

    Spindle Warm Up

    Over the past three decades, we’ve had a lot of conversations with countless clients and prospects. As you can imagine, they tend to revolve around spindles and spindle care.

    One topic that comes up regularly is the idea of doing a warmup cycle on your spindles. Responses have always been mixed — some do, some don’t, and some operate 24/7 and think they don’t have to but they do (when, for example, they replace a spindle).

    We thought we’d take some time today to talk about the importance of warming up your spindles.

    When and Why Does a Spindle Need a Warmup?

    We recommend that you do a warmup cycle after your CNC machine has been idle — whether just overnight, after a weekend, or when a spindle is installed, whether it’s new, repaired, or just pulled from storage.

    This is our recommendation for one major reason: lubrication distribution. If you crank a cold machine straight up to operating speed without taking the time to properly warm it up, you’re not giving the lubrication system time to distribute oil or grease evenly. This causes unnecessary friction, rapid temperature spikes, hastened lubrication breakdown, and damage that can be quite severe, and costly.

    How to Warmup Your Spindle

    There’s no universal way to warm up a spindle. Every machine has different runup and warmup procedures. For that reason, we always recommend that you follow the OEM’s instructions. If you don’t know them, reach out — they’re usually happy to help.

    That said, there are a few general guidelines that you should be following:

    • Warm up your spindles at every start-up. Do it incrementally, monitoring temperature as you go.
    • For oil-lubricated spindles, wait until you see oil draining before ramping up to full speed, this tells you that oil has moved through the entire system, lubricating all the parts in its path.
    • Closely monitor temperature to be certain that the spindle isn’t running too hot. If the temp creeps out of the acceptable range, dial it back, and bring it back up more gradually.
    • Monitor vibration levels as well — if you have the right equipment, like VibePro, you can monitor your machine’s vibrations and glean a huge amount of real-time performance information.


    The warmup cycle is especially important on a brand-new spindle. The process is typically referred to as “break-in”. Just like with an everyday warmup, a break-in cycle will vary by machine and maker, but here’s the general process:

    1. Start the spindle at a fraction of its maximum speed
    2. Run it for a while
    3. Monitor temperature and vibration closely
    4. If temperature and vibration remain steady, increase the speed by small increments
    5. Repeat steps 2 to 4 until:
      • Maximum RPM is reached, and
      • Temperature remains stable and within spec, and
      • Vibration remains stable and in-spec
    6. If at any time the temperature or vibration levels spike:
      • Stop the spindle
      • Return it to ambient temperature
      • Begin the process again, starting at a speed just slower than when you stopped

    What Happens if I Don’t Do It?

    Once or twice, if not severe, probably nothing (if you’re lucky).

    But if you skip it habitually? Well, in short… eventually, you’re in for a world of hurt.

    We’ve written at length about all the bad — and expensive — damage that a poorly cared for spindle can sustain. Overheating leads to premature bearing wear and aging. Wear and aging in the bearings of a spindle leads to inaccuracies and/or defects in your work product. They also, of course, lead to spindle failure and expensive repairs on a schedule that far outstrips maintenance expectations.

    All of that without even factoring in the costs and frustrations caused by ever-looming unplanned downtime.

    In short: putting your spindles through a warmup cycle may cost you some time here and there, but that’s nothing compared to the cost of shutting down your production line and rebuilding or replacing a damaged-beyond-repair spindle.

  • Shipping a Spindle Out for Repair: Do’s and Don’ts

    Typically made of high-strength steel, machine tool spindles are perceived to be solid, sturdy pieces of machinery. This is somewhat true, but spindle bearings and other mechanical components are high precision with tight tolerances as well as electrical components, all of which do not fare well under shock loads. So extra care must be taken when spindles are being sent out for repair. Once a spindle leaves home, there’s a lot that can happen out in the wild before it reaches the repair facility. To help ensure that the trip is a safe one, a spindle must be carefully packed and properly shipped.

    “The one that got away”. At some point during shipment, the spindle escaped from its box, never to be seen again. Proper packaging would have prevented this.
    Failure to do so could result in further damage to the spindle, adding to your repair bills. On the extreme end of “spindle shipments gone wrong”, we’ve had situations where we received just the packaging. That’s it. The spindle slipped out into the great unknown at some point, never to be seen again. We’ve also seen spindles improperly packaged with light-duty material such as shipping peanuts, dirty shop rags or newspapers. None of these are suitable. Let’s look at the correct way to do this:

    Wrap it Up

    The spindle should first be labeled with both the sender’s and recipient’s contact info (name, address and telephone), just in case it tries to escape. It should then be tightly wrapped in anti-corrosive paper. This will help protect it from moisture, dust, and other environmental threats. Next, you need to decide what packaging method you will be using. The decision depends on the overall size and weight.

    Pack it Up

    Spindle out of Box
    Crating this spindle would have been a better option due to its size and weight.
    For smaller, lighter units, corrugated cardboard is usually suitable. Do use sturdy double-walled boxes, as standard thickness does not provide enough protection. For medium-sized units, a wooden crate is ideal. Next you must securely brace the spindle. This will help prevent damage and keep the unit from puncturing through the box or crate. Ideally, the use of v-blocks in conjunction with support/cross braces both front and rear of the spindle, foam molding system, or dense foam to avoid shifting. Don’t just close boxes with one little piece of packing tape. Close them tightly and seal all open ends with heavy-duty shipping tape. Similarly, for crates, make sure they’re properly sealed preferably with screws rather than nails.

    Larger or heavier units should be strap mounted to a sturdy pallet, then shrink-wrapped to prevent direct exposure to the elements such as rain, snow, or whatever else it may come in contact with.

    Ship it Out

    Missing Packages from Pallet
    This shipment originally contained 5 boxes. A pallet was the right choice, however the strapping was insufficient. Shrink wrapping should have been applied as well to help keep the boxes in tact and safe from the elements.
    Once your packaging is squared away, it’s time to ship. For boxes and crates, the best tip we can offer is to declare/insure the spindle at a replacement spindle cost or approximation of it. For many carriers, doing so will mean it gets handled better than a typical package, it will get “white glove” or “high value” treatment. Crates and pallets over 75 pounds should be shipped via freight carrier. While most standard ground carriers will offer up to 150 pounds before dictating freight transport, weight capable and safe handling equipment is not always available or in use with these carriers.

  • 4 Ways to Manage Spindle Repair and Replacement (Part 2)

    Welcome to the second installment of a 2 part series that focuses on minimizing downtime by strategically managing spindle service and repair.

    The Hotel Program

    Previously, we mentioned that storage considerations can prevent certain manufacturing locations from using the Spare Spindle Program. For them, the Hotel Program, sometimes called the Stocking Program, may be ideal. In the Hotel Program, a spindle repair company stores their client’s spare spindles.

    There are any number of reasons a manufacturer would rather store spindles off-site, but they tend to boil down to matters of space or personnel. In regards to space, they could simply not have enough, or they don’t have the correct space — for example, storage without a clean, temperature/humidity controlled area is a problem, as spindles can be prone to corrosion as well as contamination ingress

    It’s a similar story for personnel: It’s common for smaller operations to not have enough staff to spare any for asset inventory tracking or monitoring, which can lead to lost spindles. (As improbable as this sounds, we do have customers lose spindles in their facilities.)

    Another consideration is that spindles need to be rotated, in both a macro and a micro sense. In a macro sense, spare spindles should be rotated — the oldest spindle should be first in line for use in case of failure, but this order can be easy to mix up without dedicated inventory personnel. In a micro sense, an individual spindle’s shaft must be rotated regularly, or else it’s at risk of degrading — most commonly, internal bearings can begin to micro-weld to the spindle shaft.

    Outsourcing your spare spindles — and, importantly, their care — to spindle experts is an ideal solution for many manufacturers with space and staffing constraints.

    The Scheduled Maintenance Approach

    Of course, the absolute gold standard is a well-planned maintenance program. With this approach, you carefully monitor your spindles and their health, removing them at designated times (or at the first signs of issues, detected with predictive analysis tools).

    With just a little bit of foresight, planning, and monitoring, you can effectively reduce or eliminate downtime. Even if you store your spindles off-site with the Hotel Program: simply request your spindle be delivered ahead of a planned maintenance window so that you have it on hand when it’s time for the swap.

    With the Scheduled Maintenance Program, you’ll also keep repair costs at a minimum, as repairs for standard wear and tear are dramatically less involved and costly than emergency repairs following catastrophic spindle failures.

    Have a question? Contact GTI to discuss these and other spindle maintenance programs that can help keep your machine shop stay up and running efficiently.

  • 4 Ways to Manage Spindle Repair and Replacement (Part 1)

    Managing spindle service and repair — both in regards to scheduled or expected maintenance, and in surprise, unexpected maintenance — can be a surprisingly complex operation. Or a surprisingly simple one, depending on various factors and preferences.

    In an ideal situation, a good spindle service plan involves preventative maintenance, careful scheduling, backup spindles, storage considerations (location and environmental conditions), and more. But that’s the platonic ideal, which we recognize doesn’t always work (or isn’t always possible) for every facility.

    Eventually, all spindles will need repair or replacement. Minor repairs can happen relatively quickly, while more complex ones typically require more time. Especially if major component reconditioning, a long and complex process, is required. In any case, you’ll need to be prepared.

    Here are a few of the more common spindle service approaches for you to consider.

    The Emergency Program

    Your spindle fails unexpectedly and you’re suddenly staring down the barrel of weeks of unplanned downtime, so you send it out for a rush emergency repair. Also known as the Quick Turn-Around (QTA) Program, this plan has pros and cons.

    The primary pro is that it’s fast, often twice or more as fast as a standard repair. Another is that while you’ll still have a notable amount of downtime, it’s less downtime than a standard no-rush repair.

    One of the primary cons is that there’s downtime at all. Typically, busy facilities without spare spindles use the Emergency Program, because if they had a healthy spare, they wouldn’t need to rush the repair of the first. Another con is the expense — repair shops typically have to apply rush charges to emergency repairs (which often cover the rush charges they need to pay for replacement parts as well as labor overtime expenses).

    There are scenarios where the Emergency Program is sensible, depending on the volume of work that needs to be done, and promised lead times. Often, it’s the only option for a facility that didn’t have a better plan in place.

    The Spare Spindle Program

    The Spare Spindle Program is incredibly simple: for every spindle type in operation in a facility, they have a spare spindle on hand on-premises. When there is a spindle failure, swap the broken one out for the spare and send it out for repairs. Since they had a backup, repairs don’t need to be expedited.

    This approach keeps unplanned downtime to an absolute minimum — hours rather than days or weeks — but there are considerations. Spindles are very expensive, and some smaller shops might not have the capital to keep spares around. There are also storage considerations that can be challenging for certain operations.

    Overall, for facilities that have the capital, proper space, and knowledge to store spindles, the Spare Storage Program is effective and relatively low-stress.

    Click here for Part 2 of this blog series, where we cover 2 additional approaches. If you have a question about anything you’ve read, don’t hesitate to contact us.

  • The Key Ingredient to Improving Reliability Success in Your Machine Shop

    One topic we hear more and more about these days is reliability. Essentially, this refers to initiatives designed to keep manufacturing facilities up and running efficiently and, well, reliably. It consists of several components such as predictive maintenance, planning, scheduling, data collection and analysis, and much more. Today, we’ll review a critical component to the success of any machine shop’s overall reliability program, regardless of size or industry.

    Let’s imagine this scenario: your driveway has nails on it from that handywork you did over the weekend. When you pull your car out of the garage on Monday morning, you’re likely going to get a flat tire. You’ll go to the mechanic to have it fixed and when you return home, you will identify the cause of your tire failure — the aforementioned nails — and clean them up so that you do not get another flat tire when you pull your car back in.

    This will no doubt seem incredibly obvious: remove the cause of the failure in order to prevent it from recurring. Yet for some reason, in industrial spaces and particularly with machine tool spindles, companies seek out repair services and rarely attempt to learn or address what caused the failure in the first place.

    Boost Profitability with Root Cause of Failure Analysis

    You can probably see the issue with this mode of thought. You’re already experiencing unplanned downtime, and you want to just get the repair done and get the machine back in service. But without addressing what caused the need for the repair, you’ll eventually need to make the same repair again. And again. And again.

    Before you know it, you’ve spent untold thousands of dollars on repairs that could have been avoided. Depending on how extensive the required repairs are and how often they recur, you can be taking a good hit to your profitability.

    Contaminated Spindle
    This spindle was contaminated with external debris. With this knowledge, the customer can take steps to prevent this from recurring.

    Luckily, the solution is simple. Every time you have a spindle failure that results in repairs, don’t settle on just the repairs — a Root Cause of Failure Analysis should be done. A Root Cause of Failure Analysis is exactly what it sounds like: figure out what caused the spindle failure, and remedy the issue. For instance, when we take in a spindle for repair at GTI, one of the first things we will do is a failure analysis. We provide customers with a detailed report on not just wait cause the failure but what most likely caused the cause-of-failure. If needed, we can also send a specialist to your facility to assist in determining the root cause. They will investigate and identify other issues beyond the spindle itself, such as the machine it’s in, the environment the machine operating under, related system components, and so on. For instance, improper lubrication is often a contributing cause to spindle failure.

    5 Common Causes of Spindle Failure

    In the course of our spindle repair work, we’ve encountered any number of failure causes, from the mundane to some more unexpected ones. However, out of the countless repairs we’ve undertaken over the years, we’ve found that the majority of failures are caused by one of five things:

    • Clean Spindle Component
      The rear of the same spindle had ample, clean oil and no contamination evident, allowing us to rule out lack of lubrication or contaminated oil supply as the root cause of failure.

      Improper lubrication — Maybe it works for bike chains, but with machine tool spindles, more grease is not always better. Machinery, and particularly spindles, have very specific lubrication requirements. Straying from prescribed specifications — whether using too much, too little, or a different type — can quickly lead to spindle failure.

    • Contaminated lubrication — This one speaks for itself. Lubrication is meant to help different parts move together with a minimum amount of friction. If your lubrication is contaminated with anything, from as small as dust to as large as metal shavings, this will prevent the lubricant from properly doing its job.
    • Unbalanced tooling — It pays to take the extra time to get your tool holders/tooling set up properly, within tolerances and ISO balance grade specification. If your tool holders/tools are not within specification and/or out of geometry by even just small amounts, you’re inviting spindle failure (not to mention quality issues for the components you’re machining).
    • Electrical mis-programming — Giving too much or too little power to your machinery is a lot like unbalanced tooling in that you only need to go out of specifications by miniscule amounts before your machinery begins to be negatively impacted.
    • Operator/machine crashes — Human error will always be a factor, and there’s not much you can do to prevent it. Simply train your operators as thoroughly as possible, and retrain them regularly. For the machine, make sure to keep good maintenance practices (including software updates). Because failures caused by crashes tend to be the most serious.

    Addressing the root cause of failure is as important as getting the spindle properly repaired quickly and back in service. Sometimes the fix is simple (like adjusting your lubrication levels). Occasionally the solution requires something more extensive, like outright redesigning and rebuilding older equipment. Whatever the case, with a root cause of failure analysis and taking corrective action, you’ll help keep repair bills in check, and have a much successful and efficient reliability program.

  • Achieving Cost Savings with Improved Maintenance and Cooperation

    The push and pull between production teams and maintenance teams is a familiar story on shop floors across all sectors. Maintenance wants to keep machines running well, maximizing efficiency and lifespan; production wants a steady stream of finished parts going out the door.

    We all know who gets their way most often. Production, who tend to run machinery — spindles, in particular — to the point of failure.

    Cost-Benefit Analysis

    With a very short-term view of things, this method makes a degree of sense. After all, maintenance means downtime which means you’re not making money, unless you have a back-up unit to swap into service. But the truth is that running spindles to failure leads to repair bills that are higher and lead times that are longer — in some cases, dramatically so — than they would be otherwise.

    Here’s an example. If you remove a spindle for repair just as its beginning to show signs of wear, you’re looking at what we call a Schedule A repair: new bearings and light (if any) grind-chrome plate-regrinding, for a cost of about $5,000.

    If you run the same spindle to the point of failure, you’re looking at a much more extensive Schedule C repair: new bearings; full grind-chrome plate-regrinding of both shaft bearing journals and of housing bores, and stator rewinds. Repairs at this level start at $15,000, or 300% more. And that doesn’t include the cost of longer periods of unplanned downtime or damage to other parts of your machinery that more violent failures can cause.

    Pushing production to the point of spindle failure may seem smart short-term, but in the longer term you’re wasting huge amounts of money on unnecessary repairs.

    Cost Savings with Predictive Analysis

    VibePro Vibration Analysis ReportLuckily, there is a relatively simple way to get both your production and maintenance teams on the same page, working together to keep production up while simultaneously saving repair and maintenance cost. It’s predictive analysis, paired with cloud-based reporting.

    The spindle of any given machine operates within exceedingly specific bearing frequency ranges, particularly when it comes to acceleration and velocity. Your spindle could be far outside of these tolerances, damaging your equipment, long before a human ear would be able to tell.

    With a vibration monitoring system, you can keep track of exactly how your spindles are performing. And with cloud-based reporting, both your production and maintenance teams have easy access to current and actionable performance data. They’ll be empowered to stop fighting and instead collaborate on building a maintenance schedule that helps maximize production and the life of machining equipment, while preventing costly Schedule C repairs.


  • Achieving In-House Spindle Repair

    No matter how built-out your in-house repair department is — how well-equipped or how well-staffed — there will be times when you need to outsource certain services, and source replacement parts. That’s a simple fact. Even union facilities, which mandate in-house repairs, need to outsource certain things they can’t do themselves, due to lack of either equipment or specific expertise.

    That’s the nature of the modern manufacturing workspace. You simply can’t do it all. And frankly, you shouldn’t strive to.

    Are You Really Solving the Problem?

    One of the most commonly seen issues at facilities with in-house programs is that components on failed spindles are simply swapped out, without addressing the root cause of failure. This leads to repeat failure, quickly, and possibly more extensive damage.

    In-house Spindle Repair Support
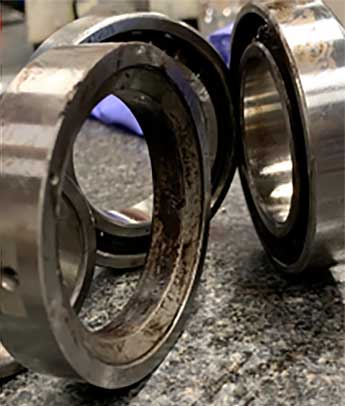
Take a bearing. If one fails and you simply replace it, and never learn the reason it failed, your setting yourself up for more failure and headaches. The cause could be a worn, or undersized, bearing journal, that will continue to cause bearings to fail. Until you rework the journal to specification, you’re just throwing good money after bad, as the saying goes.

    It’s like putting air in a tire that’s on a bent rim. You can fill that tire as many times as you want, or even replace the tire, but until you replace or repair the rim — until you address the underlying cause — your tire is going to keep getting flat.

    Outsource Unique Requirements

    Luckily, in today’s manufacturing landscape, you can find somebody with expertise in anything, no matter how niche of a discipline it may seem to you. You can’t possibly be expected to maintain in-house expertise in such a wide variety of unique processes and parts, especially with current labor constraints.

    Commonly outsourced services, other than bearing inspection and replacement, include:

    • Shaft reworks — grind-chrome plate regrinding, welding, straightening, quill/tooling extraction, etc.
    • Shaft balancing and other component balancing
    • Housing reworks, including grind-chrome plate regrinding

    Parts that you’ll need to purchase include:

    • Bearing kits, including seal kits
    • Drawbar kits — drawbar rework and drawbar rod grind-chrome plate regrind
      • Drawbars are unique in that they’re made of not only the drawbar itself but also Belleville washers, which break down and fail over time.

    It’s important to source “exact match” replacement parts, in accordance with the manufacturer’s stated specifications. “Close enough” will not do. It might work briefly, but eventually will lead to more problems. In certain cases, a spindle needs to be disassembled and a part may need to be reverse engineered. This is particularly true for older models, as well as certain less common brands of specialty spindles.

    You should also consider outsourcing training and other support services. Certain complex machinery, such as spindles, require more detailed knowledge than you can expect to maintain in-house, but also more regular maintenance than is possible with outsourcing alone. Getting training and support from a specialist bridges that gap.

    Strictly in terms of spindles, a support training program should include:

    • Proper disassembly and assembly
    • Proper diagnostics
    • Proper break-in and testing

    Inspection, including:

    • Electrical components
      • Machine interface components
      • Mechanical component dimension and tolerancing
    • Vibration analysis and balancing (Trim Balance)
    • Bearing mounting / installation

    Finally, you can help to ease the burden on your in-house repair program and lower the financial impacts of repeat failure with the smart implementation of a predictive maintenance strategy.


    GTI Spindle Technology offers a variety of services and products to compliment your in-house maintenance and repair programs. This includes training, replacement parts, reverse engineering and powerful vibration analysis and balancing tools to help you identify potential issues long before they become complex and costly failures.

  • Monitoring Your Rotary Unions to Avoid Spindle Failure

    For spindles that utilize through-tool coolant, rotary unions can be a common cause of failure. And yet, they are equally overlooked — few people include rotary unions on their periodic inspection routines.

    Rotary unions are specialty joints designed to allow connection of a stationary to a rotating piece of equipment. In spindle applications, rotary unions allow for the connection of coolant tubes, mounted to the drawbar and interlocked with the internals of the rotary union (rotating). The housing of the rotary union attached with the hydraulic and coolant hoses are stationary (non-rotating). The drawbar with the spindle shaft is rotating thus allowing coolant to flow through the union through the drawbar and to the machining operation/part being machined.

    The primary reason for failure in rotary unions are the seals. There are coolant tube seals, hydraulic seals, and face seals for the coolant through. Spindle failure is sure to follow if the seals are worn over time.

    Rotary Union Lifespan Considerations

    Rotary-Union
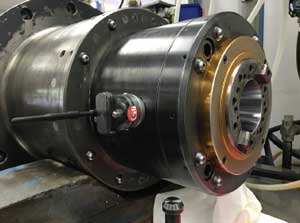
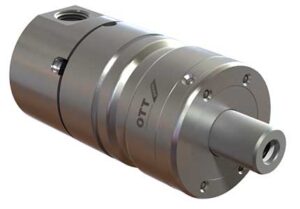
We reached out to Harold Goellner, Product Manager/Senior Engineer at Advanced Machine and Engineering Co., our colleague, and an expert on rotary unions and tool clamping systems. We asked him about the types of scenarios and conditions that impact a rotary union’s usable lifespan. Naturally, the two most important things to a rotary union’s lifespan are the RPMs that the spindle (and therefore the union) operate at, and the through pressure of the coolant.

    Harold also shared a variety of other environmental and usage-based conditions that can negatively impact rotary union lifespan. They include:

    • Side-loading of supply lines connected to the ports, which can cause union runout
    • Installation of unions with mounting surfaces that do not match the spindle’s specifications, which can cause runout
    • Deadheading of the tool which blocks coolant flow through the drawbar, even if temporary
    • Use of improper or insufficient filtration, making internal seals and bearings vulnerable:
      • Typically recommended filter grade is 50 microns or less
      • Filter media purity is laid out in ISO 4409 -/17/14
      • Consider the type of material being machined (e.g. glass and cast iron are more abrasive than other types, require finer filtration)
    • High running temperatures
    • Running at RPMs in excess of the union’s specifications
    • Operating with improper hydraulic and coolant pressures, either under or over the defined ranges
    • Allowing/causing pressure spikes or pulsation, which can cause shock in contact seals
    • Improper residual pressure on hydraulic seals during rotation, which causes premature seal wear
    • Use of improper coolant types

    Leaky Unions Do Not Necessarily Mean Defective Unions

    It’s important to note that rotary unions leak as part of normal operations. The presence of a certain degree of leakage is normal and expected, and not necessarily indicative of a defective rotary union. This is why, when testing spindles in the shop, we at GTI pressure check rotary unions and verify against manufacturer specifications. We also offer leakage sensors, which constantly measure leakage rates and trigger alarms when rates exceed normal. Some rotary unions offer threaded drainage ports to route leakage back to the hydraulic and coolant tanks to prevent drainage into the spindle.

    It’s important to keep an eye on your rotary unions, including with leakage monitoring. If caught and replaced before failure, there is significant cost savings. In most cases, a failed union will allow coolant contamination to enter the spindle/spindle bearings and will then necessitate a full spindle repair/rebuild in addition to replacement of the union.


    Special thanks to Harold Goellner, Product Manager/Senior Engineer at Advanced Machine and Engineering Co., for his contributions to this blog.