We understand the impulse to get a new spindle installed, and up and running, as quickly as possible. Time is money, after all — especially in fiercely competitive manufacturing spaces.
The fact is, though, that in their desire to minimize costly downtime, many CNC operators rush the spindle installation process. This simply sets the stage for bigger and more expensive issues down the road.
It pays to do it right, so here’s a refresher.
Why take the time to install a spindle properly?
Most maintenance questions relating to spindles boil down to one simple equation: pay now or pay more later.
That might seem reductive, but it’s the truth. You can periodically pull spindles for regularly scheduled maintenance, costing a few hours of downtime to do the swap; or you can wait for a catastrophic failure, costing tens of thousands in repair or replacement costs, plus many more in unplanned downtime.
The same holds true for new spindle installations. It may take a couple more hours than you’d like in order to do a good, thorough, by-the-books installation of a new spindle, but you’ll be saving yourself untold thousands of dollars in expenses later on.
Proper spindle installation
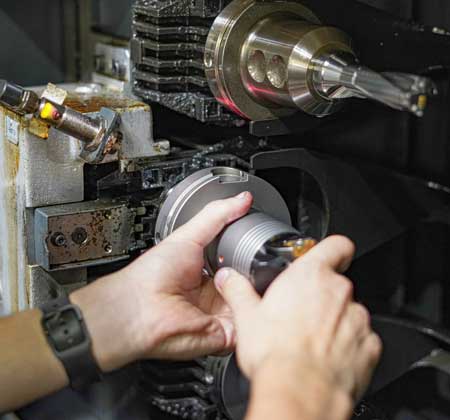
 Spindles are super-precision instruments that require the highest degree of care, handling, and calibration. This means that installation can be rather a complex process.
Every CNC machine and every spindle is unique. As such, they each have unique installation processes. The steps detailed below should be considered general guidelines — always follow manufacturer-provided process when installing a new spindle.
Safety
Do not perform any maintenance on any machinery without first disconnecting the equipment from power.
Pre-installation Spindle & Machine Inspection
Before installing a spindle, be sure to inspect both the spindle itself and the machine in which it is to be installed. Check the following:
- Use caution to avoid impacts, which can damage spindle bearings
- Clean all mounting surfaces, both on the CNC and the spindle itself
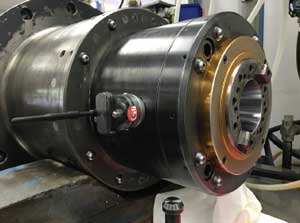
Mounting
Mounting a super high-precision component like a spindle is a delicate job, as even small mistakes can have notable impacts. While mounting:
- Use chains or straps with enough lift capacity to minimize risk of drops
- Do not force a spindle into position under any circumstance; if a spindle will not fit, stop and ensure that you’re attempting to mount it in the correct way
- Back off immediately in the event of binding
- Secure the spindle to standard torque values, unless other values are specifically called out in the manufacturer’s mounting instructions
- Overtightened bolts will distort the spindle housing, which can result in instant spindle failure
- Never use pipe dope, tape, or other compounds on the threads of lubrication fittings
- Ensure that all mounting accessories — rotary unions, draw bars, pulleys, toolways, etc. — are clean, new (when recommended, like for rotary unions), and installed properly
Lubrication System Connection
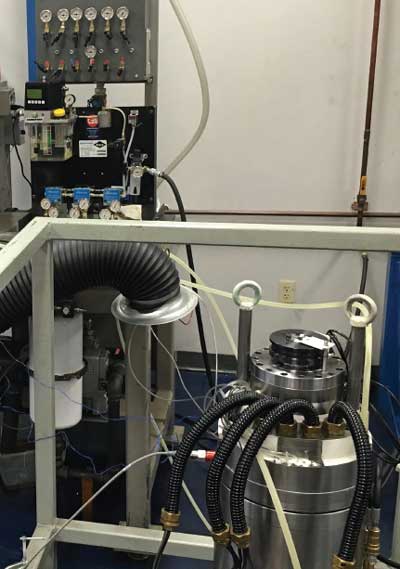 After physically mounting a spindle, the lubrication system must be connected. Ensuring cleanliness of the system is of utmost importance, as there is no filter between the lubricator and the spindle. When connecting a mounted spindle to the lubrication system, consider the following:
- Keep all hoses and fittings clean, inside and out
- Ensure hoses are free from kinks
- Never use any sort of fitting aid (pipe dope or PTFE tape)
- Where possible, blow air through lines for at least 5 seconds to dislodge contaminants
- After all connections are made, test the system:
- On drip systems, calibrate air pressure
- Test lubrication pressure
- Test flow
Post-installation Spindle & Machine Inspection
There are a variety of tests and inspections that you should make before attempting to start up and run in your newly installed spindle. A few of these checks include:
- Air purge/blow out
- Direction of rotation
- Distention
- Encoder feedback
- Runout
- Taper blast
- Tool knockout, changer alignment, and retention
Start Up & Run In
Starting up and running in your newly installed spindle is a critical phase in the installation process — if not performed correctly, all of the careful work you’ve done so far can be undone in seconds. You should always carefully follow the manufacturer-specified procedures, but you can see our blog post on spindle start up and run in for a helpful overview.
Conclusion
Spindles are delicate, super-precision components, which makes every stage of installation incredibly important. That’s why we put so much emphasis on following manufacturers’ instructions whenever available.
When installing a new spindle, make sure that you carefully follow all installation steps. This includes two extremely important considerations: balancing and gathering vibration reading baselines, which we’ll talk about next month — stay tuned.